Getting Started
For: Studio Owners & Managers
Welcome to ClassLift. This page is your setup checklist — it walks you through everything you do to get a brand-new studio running, in the order that works, and links to the in-depth guide for each step. You don't need to read the whole manual first; follow the steps here and open Learn more when you want the detail.
Setup takes most studios an afternoon. Sign in to your back office in a web browser with your owner account; after signing in you land on the Dashboard (Home). You're on a free trial, so you can build everything out before adding a payment method.
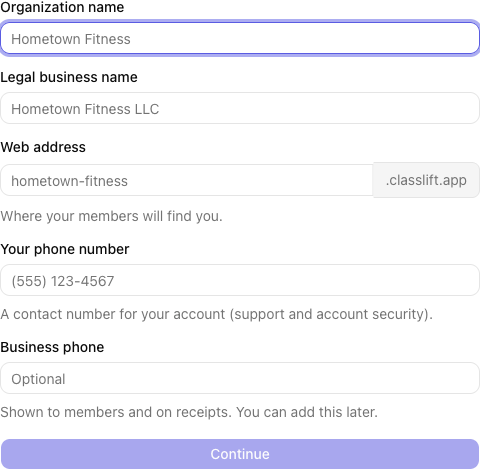
Your very first step is creating your organization. On the Create your organization screen you name your studio and enter two phone numbers:
- Your phone number (required) — a contact number for your account, used for support and account security.
- Business phone (optional) — the number shown to members and on receipts. You can add this later under Settings → Organization.
How to use this page. The steps are grouped into four phases. Steps in Phase 1 and Phase 2 are the critical path — each one unlocks the next (you can't create a class without a location, or invite a member without a plan). Steps marked Optional are branches you can skip or come back to.
Phase 1 — Configure your studio
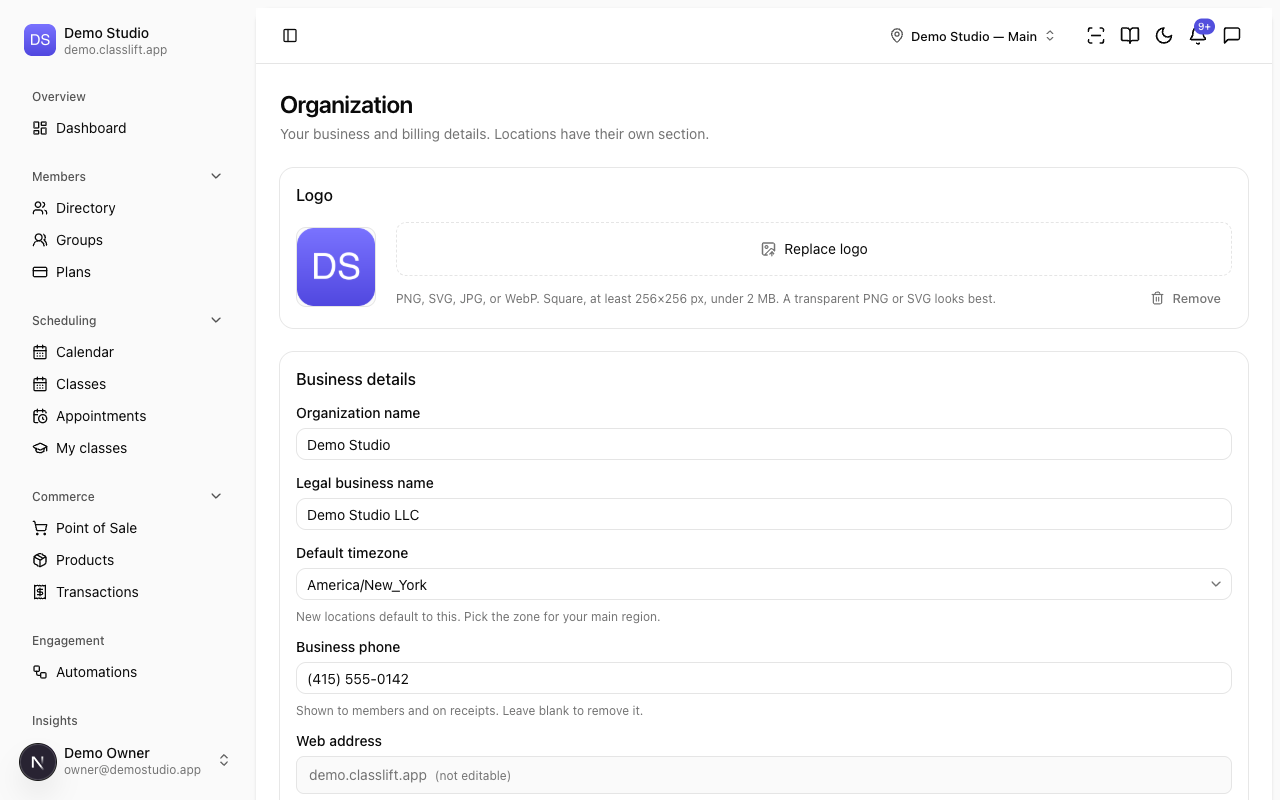
1. Set your organization profile and studio defaults. Set your Default timezone and Default currency first — new locations, plans, and products all inherit them. While you're here, upload your logo and set the default policy cards (booking and cancellation, no-show handling, the Check-in grace window, reminders, and quiet hours). Each card saves on its own. Go to Settings → Organization.
Learn more → Organization settings
2. Add a payment method. (Owner only.) ClassLift is a flat $129/mo per active location — no per-member fees. Add a card before your trial ends so nothing lapses. Payments you take from members go straight to your own bank; ClassLift takes no cut. Go to Settings → Billing → Add payment method. Learn more → Billing
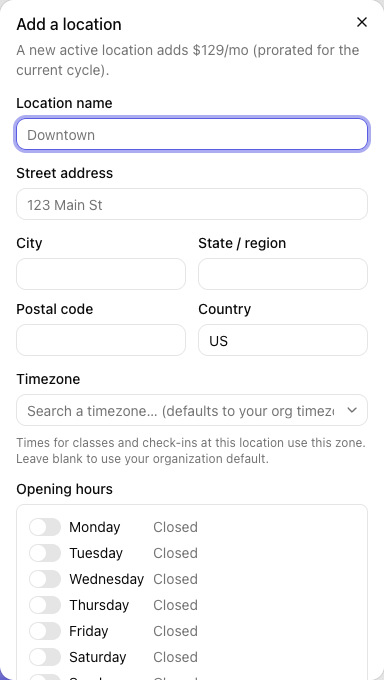
3. Add your locations. This is the step that unlocks the rest — rooms, classes, location-scoped plans, card readers, and product stock all need a location first. Add each site with its address, timezone, and opening hours. Go to Facilities → Locations → Add location.
Learn more → Locations
4. Add your rooms. Rooms let you assign class sessions to a space and catch double-bookings. Give each a name and location (and optional capacity). Go to Facilities → Rooms → New room. Learn more → Rooms
5. Pair a card reader. (Optional.) If you'll take card-present payments at the front desk, pair a Stripe Terminal reader to a location. Go to Facilities → Locations → Card readers → Pair a reader. Learn more → Locations
6. Invite your team. Add your managers, front-desk staff, and instructors, and scope each person's Location access if you run more than one site. Go to Settings → Team → Invite staff. Learn more → Team
Phase 2 — Build what you sell
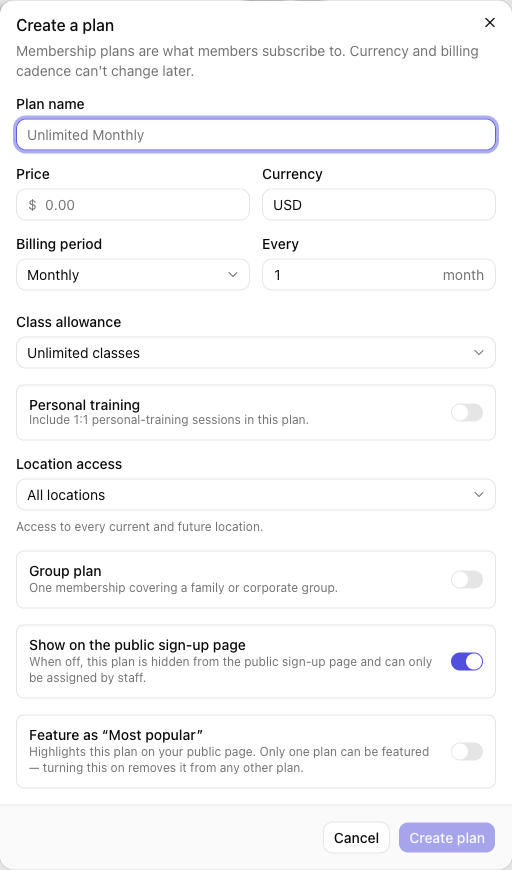
7. Create your membership plans. Plans are what members subscribe to. Set the price (a $0 plan works nicely for trials or drop-ins), billing period, and class allowance. If you'll offer family or corporate memberships, turn on Group plan here. Go to Members → Plans → Create plan.
Learn more → Creating a plan
8. Add your documents and waivers. Create any waivers or policies members must agree to. Paste the complete wording into Document text — that's what members read on screen before they sign. Mark the ones you require — members sign these when they join, so create them before you invite anyone, and get the wording right first: once someone has signed, changing the text asks everyone to re-sign. Go to Compliance & Data → Documents → New document. Learn more → Documents
9. Create your classes and schedules. Define each class (name, location, duration, capacity), then add a recurring schedule so it lands on the calendar — set the weekdays, start time, instructor, and how far ahead to publish. Go to Scheduling → Classes → New class, then open the class and choose Schedules → Add schedule. Learn more → Creating classes and schedules
Phase 3 — Go live & bring in members
10. Review your public site. (Checkpoint — nothing to build.) Your public page is generated automatically from your logo, name, active plans, upcoming classes, and active locations. Once Phases 1–2 are done, open it and check that everything looks right — this is the moment your studio is presentable to prospective members. Find your web address at Settings → Organization. Learn more → Managing your public page
11. Import your existing members. (If you're switching from another system.) Use the migration wizard to bring members across. Import members first, then memberships — a membership matches a member by email and a plan by name, so both must already exist. Go to Compliance & Data → Migration. Learn more → Migration
12. Invite members and add dependents. Invite members by email and assign a plan; they confirm their details and sign any required waivers to activate. Add children or dependents under a guardian where you offer family memberships. Go to Members → Directory → Invite member (or Add dependent). Learn more → The member directory · Dependents and guardians
13. Set up groups. (Optional.) For family or corporate memberships, create a group on a group-enabled plan and add or invite its members. Go to Members → Groups → New group. Learn more → Managing a group
14. Add your point-of-sale products. Set up retail items, drop-ins, or packages, and set stock per location for anything you track. Go to Commerce → Products → Add product. Learn more → Managing products
Phase 4 — Run day to day
15. Connect access control. (Optional.) If your doors are gated, connect your access-control vendor and map it to your locations. Go to Facilities → Access control. Learn more → Access control
16. Check that check-in works. Members check in with a rotating QR code. From any screen, the front desk uses the scan icon in the top bar (Check in a member); you can also check people in from a class roster, or run a tablet in Kiosk mode. Learn more → Check-in · Kiosk mode
17. Set your notifications and turn on automations. Trim your Organization channel defaults so you only send the messages you want, then turn on the recommended automations (welcome messages, reminders, win-backs) in one click. Save these for last — they act on members and events that only exist once your studio is populated. Go to Settings → Notifications, then Engagement → Automations → Set up recommended automations. Learn more → Notifications · Creating automations
Your setup at a glance
| # | Step | Where | You're done when… |
|---|---|---|---|
| 1 | Organization + defaults | Settings → Organization | Timezone, currency, and logo are set |
| 2 | Billing | Settings → Billing | A default payment method is saved |
| 3 | Locations | Facilities → Locations | Each site is active |
| 4 | Rooms | Facilities → Rooms | Your spaces exist |
| 6 | Team | Settings → Team | Staff are invited with the right access |
| 7 | Plans | Members → Plans | At least one active plan exists |
| 8 | Documents | Compliance & Data → Documents | Required waivers are published |
| 9 | Classes + schedules | Scheduling → Classes | Sessions appear on the calendar |
| 10 | Public site | Settings → Organization (address) | Your page looks right |
| 11–12 | Members | Members → Directory | Members are imported or invited |
| 14 | Products | Commerce → Products | Your till is stocked |
| 16 | Check-in | Top-bar scan | A test check-in works |
| 17 | Notifications + automations | Settings → Notifications, Engagement → Automations | Your starter automations are on |
Tips
- Follow the critical path first. Steps 1–9 build on each other; the optional steps (5, 13, 15) can wait.
- Start with a $0 plan if you just want to get members in the door — you can add paid plans anytime, and changing a plan's price never re-prices existing members.
- The public site takes care of itself. It comes to life the moment your logo, plans, schedule, and locations are in place — there's no separate website to build.
- You don't have to finish in one sitting. Everything saves as you go; come back and pick up where you left off.