The ClassLift app on your phone
For: Owners, Managers, Front-desk Staff & Instructors
You don't have to be at the front desk to run the studio. The same account you use for the back office signs in to the ClassLift app on your phone — and when you sign in with a staff, manager, owner, or instructor account, the app opens the back office, not the member view. What you see is tailored to your role, so you get the parts of the studio you actually need while you're on the floor.
Key concepts
| Concept | What it means |
|---|---|
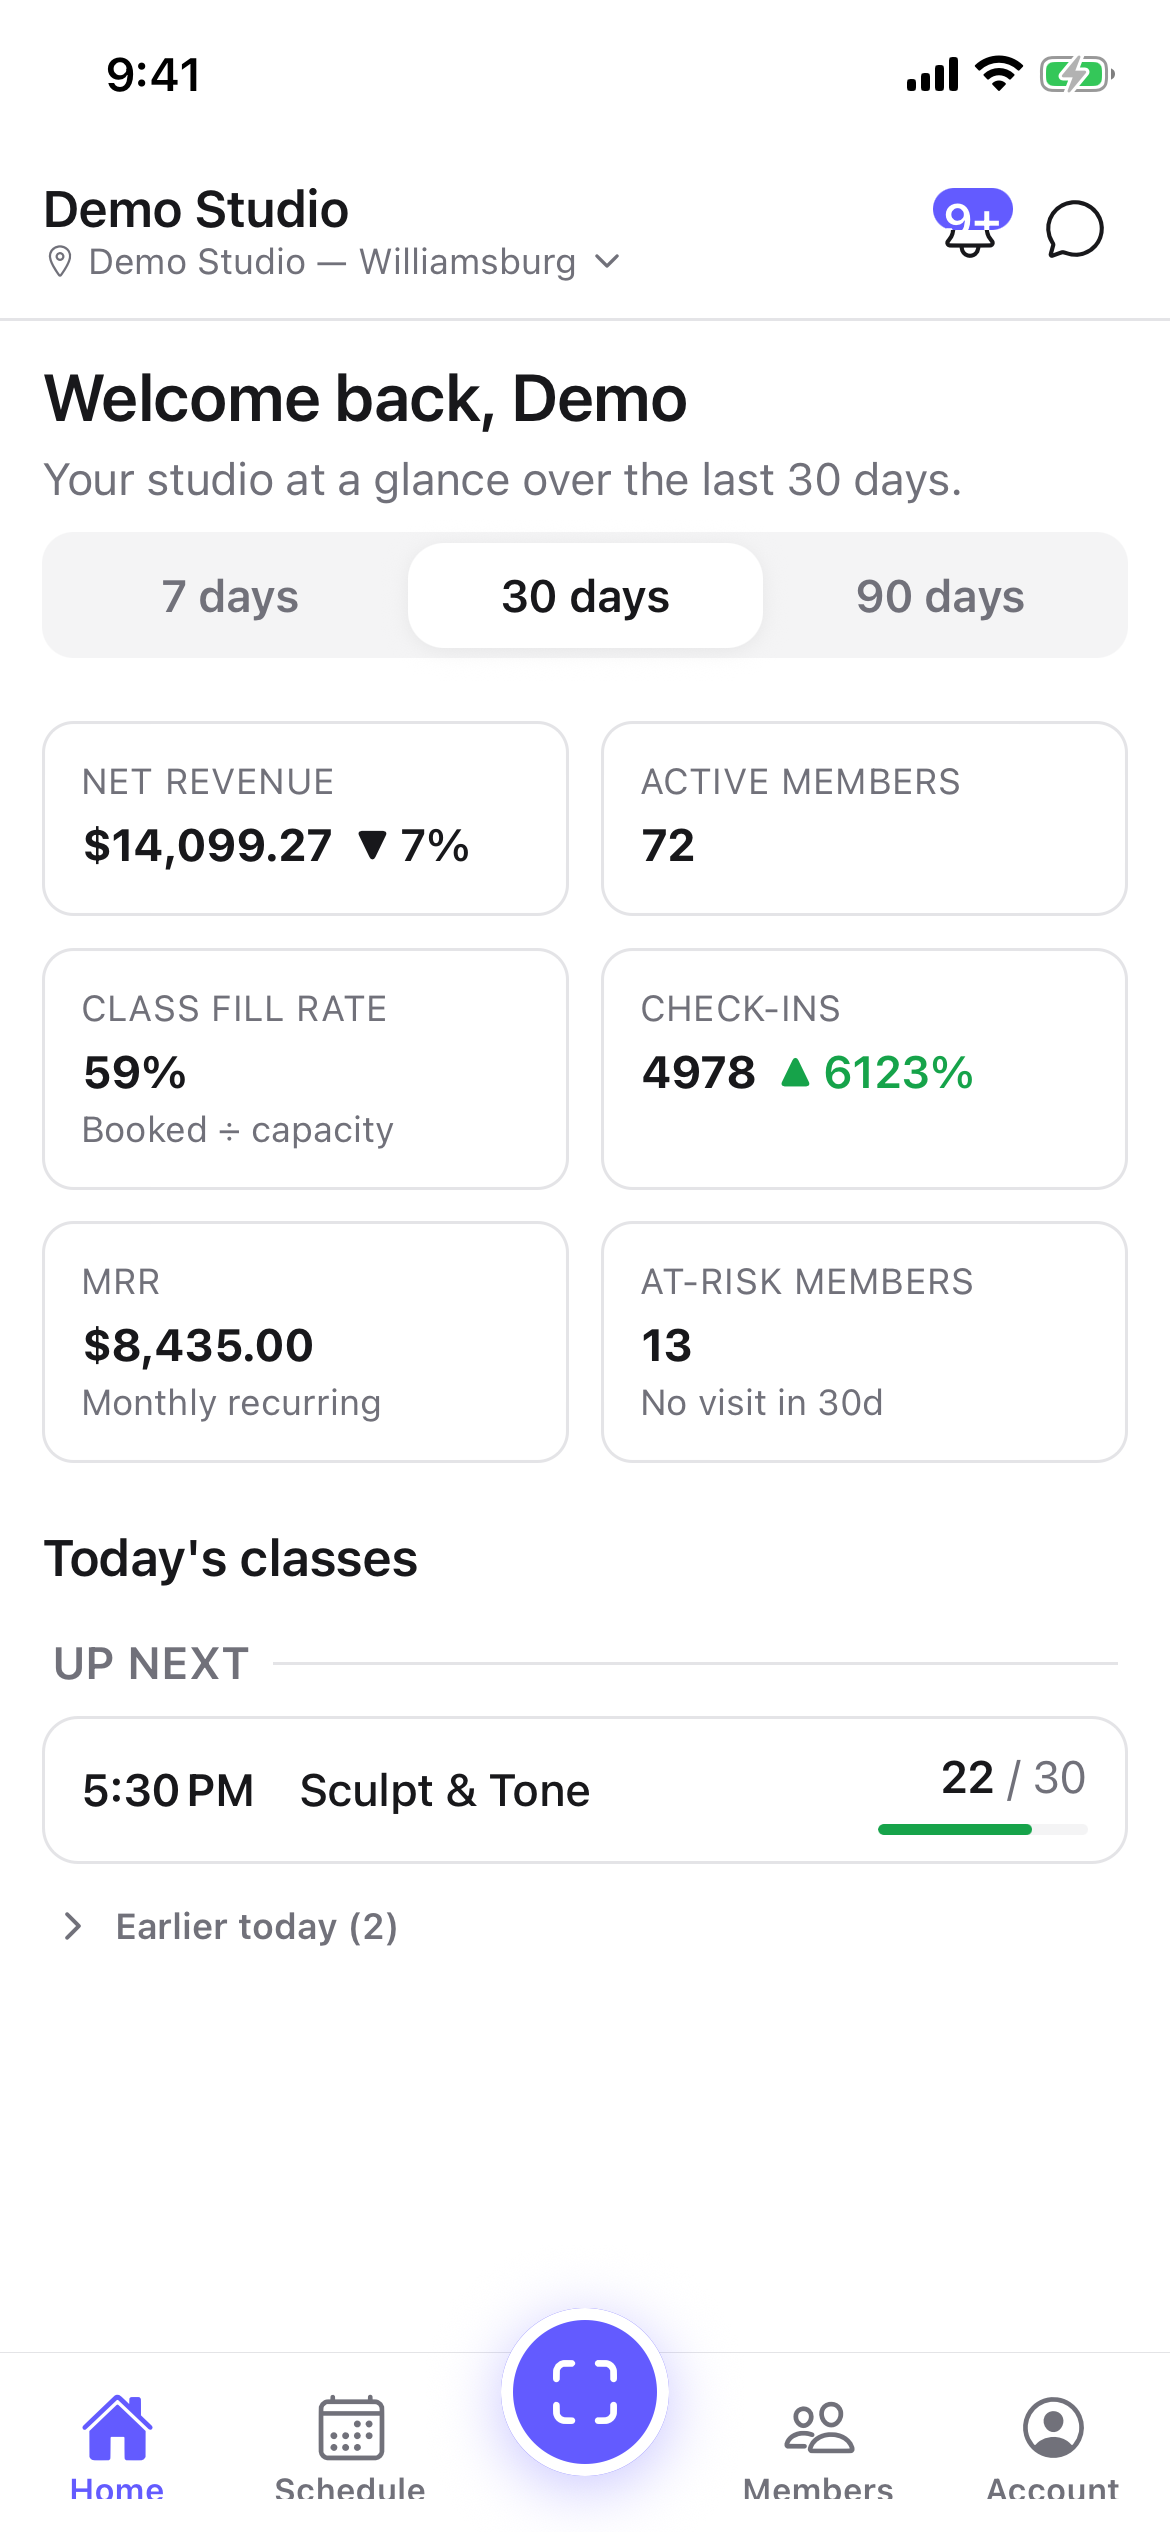
| Your home screen | Tailored to your role — a studio dashboard, a front-desk agenda, or your teaching schedule. |
| Check in | The center Scan button. Point your camera at a member's code, or search by name. |
| Operating location | The site you're working at today. It scopes your dashboard, sales, and where check-ins are recorded. |
| Point of sale | Sell products and take payment from your phone. Reached from your Home dashboard. |
| View as member | A one-tap switch to see the app as a member would — your own bookings, code, and schedule. |
How it works
- Sign in with the same email your studio set you up with. The app opens the back office automatically — no separate staff app to download.
- Your home screen matches your role:
- Owners & Managers see the studio at a glance — revenue, active members, class fill, check-ins, and today's classes — over the last 7, 30, or 90 days.
- Front-desk Staff see a front-desk agenda: today's classes grouped into what's happening now, up next, and earlier today, with live fill and check-in counts, plus a big Check in a member button.
- Instructors see their own teaching — today's classes, the rest of the week, and 30-day teaching stats.
- If you both run the desk and teach, your front-desk home adds a Your teaching today strip.
- Open a class from the Schedule tab to work its roster — see Running a class roster.
- Look a member up from the Members tab (owners, managers, and front desk) — see Looking up a member.
- Check members in from the center Scan button — see Checking members in on your phone.
- Set your location from the studio name at the top when you work across more than one site.
- Switch to the member view any time from Account — handy if you also take classes yourself.
Checking members in on your phone
The center Scan button opens the front desk's most common task.
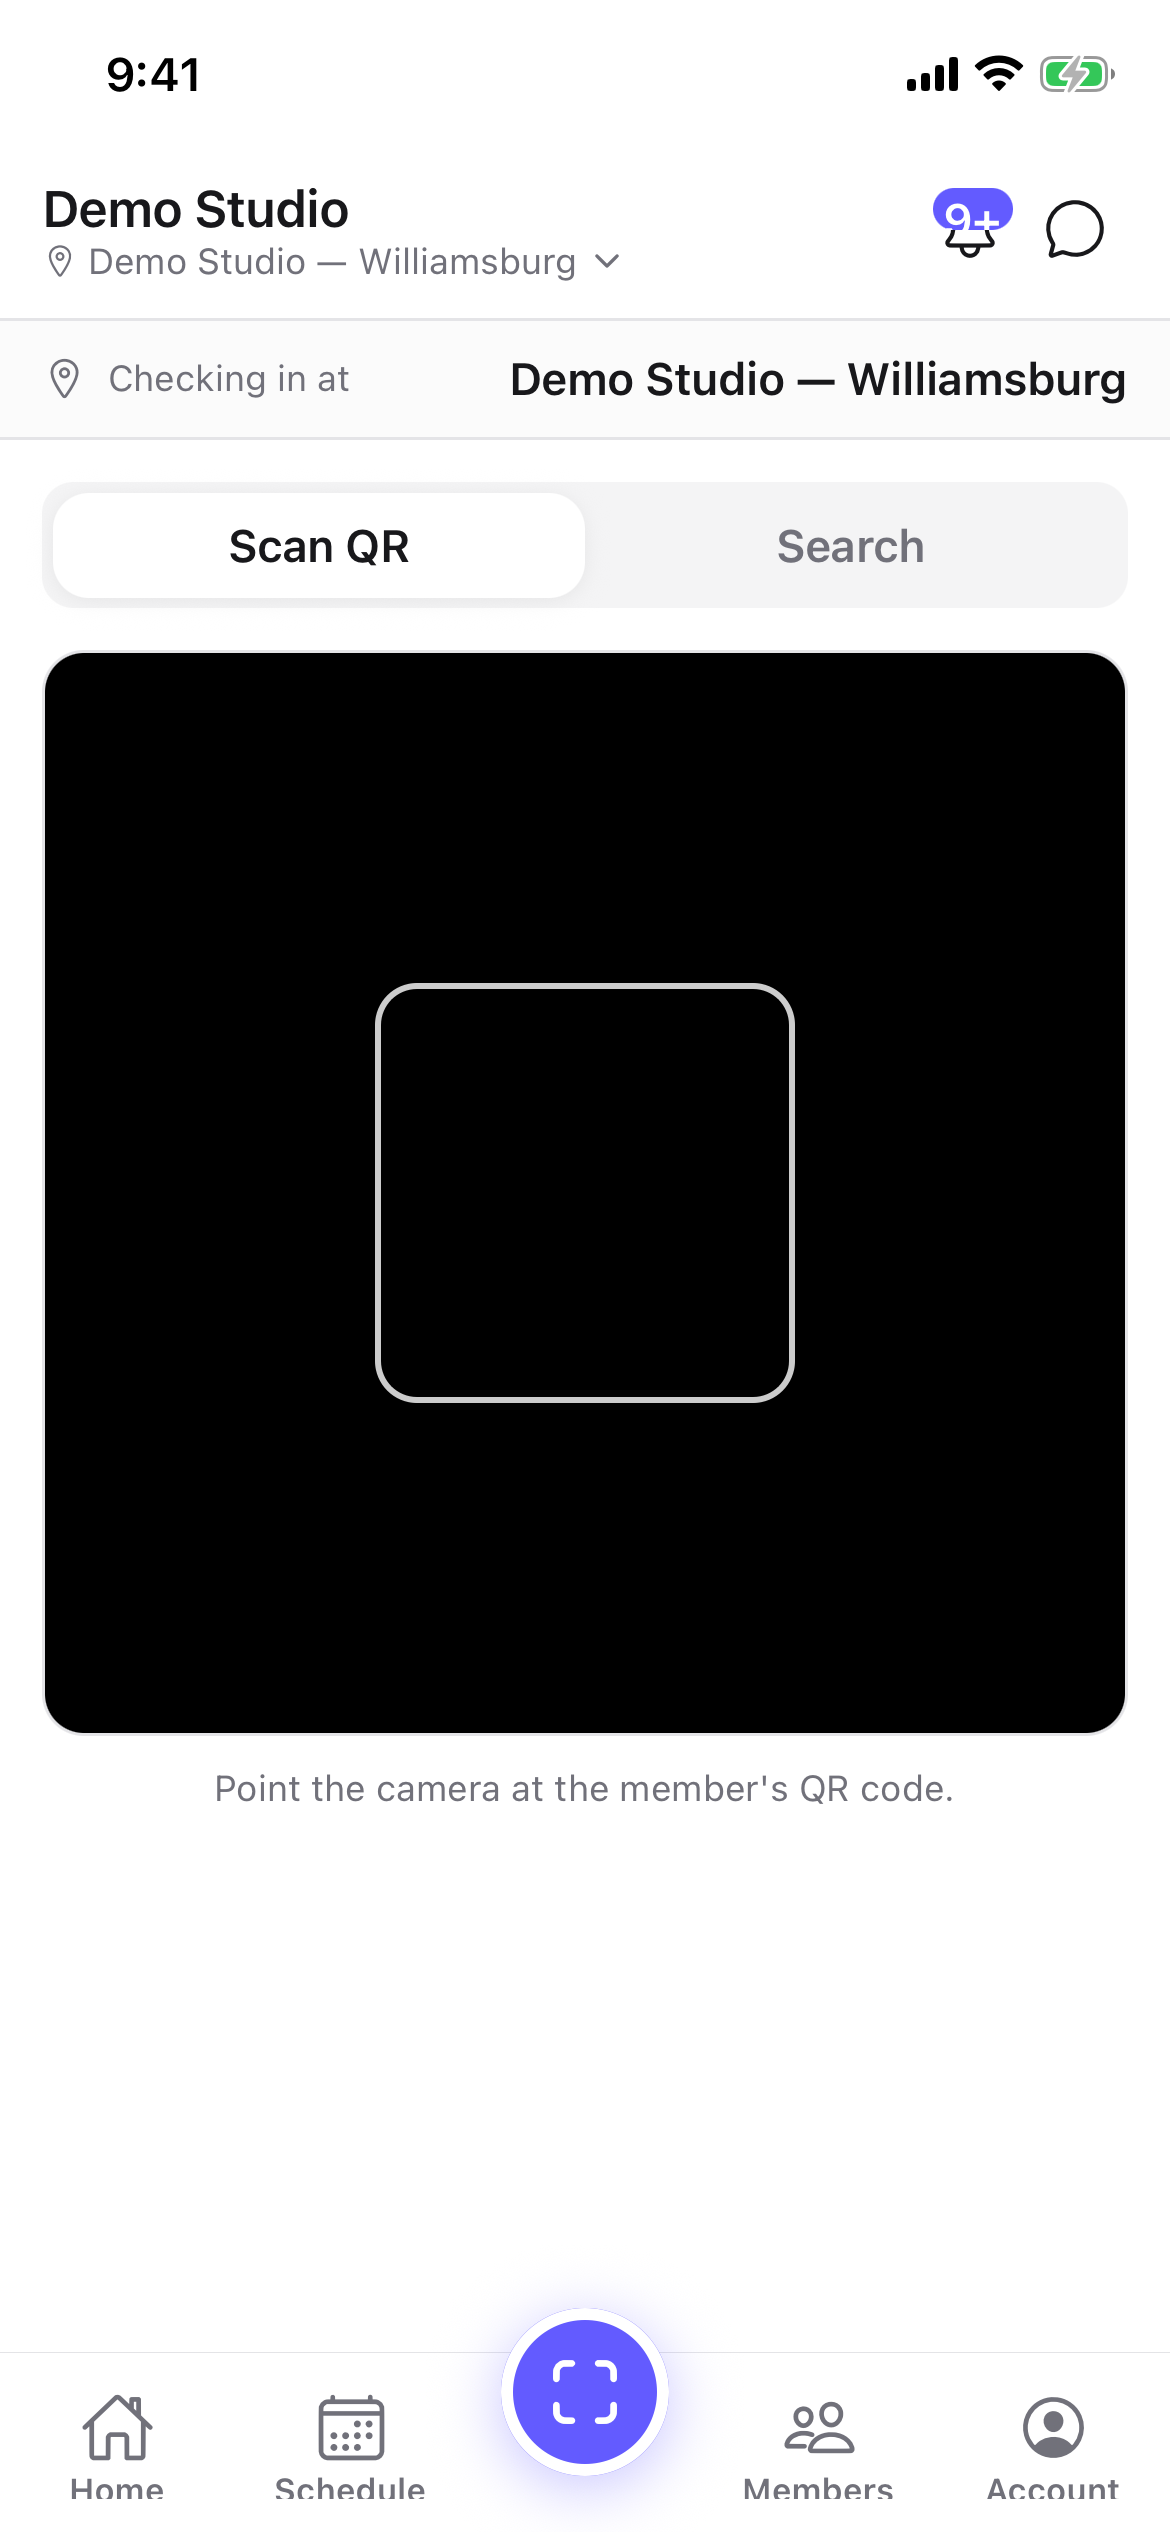
- Scan QR — point your camera at the member's check-in code. The first time, allow camera access. A guardian's code brings up their family so you can check in everyone who's here in one tap.
- Search — no code handy? Switch to Search, type a name or email, and tap the member. You'll see a heads-up if their membership isn't active.
- Check-ins are recorded against your operating location — shown at the top as "Checking in at." If you haven't picked a site yet, choose one before scanning.
Running a class roster
The Schedule tab shows a 7-day strip; tap a day to see its classes, then tap a class to open its roster. Owners, managers, and front desk see the studio's classes at your operating location; instructors see their own teaching.
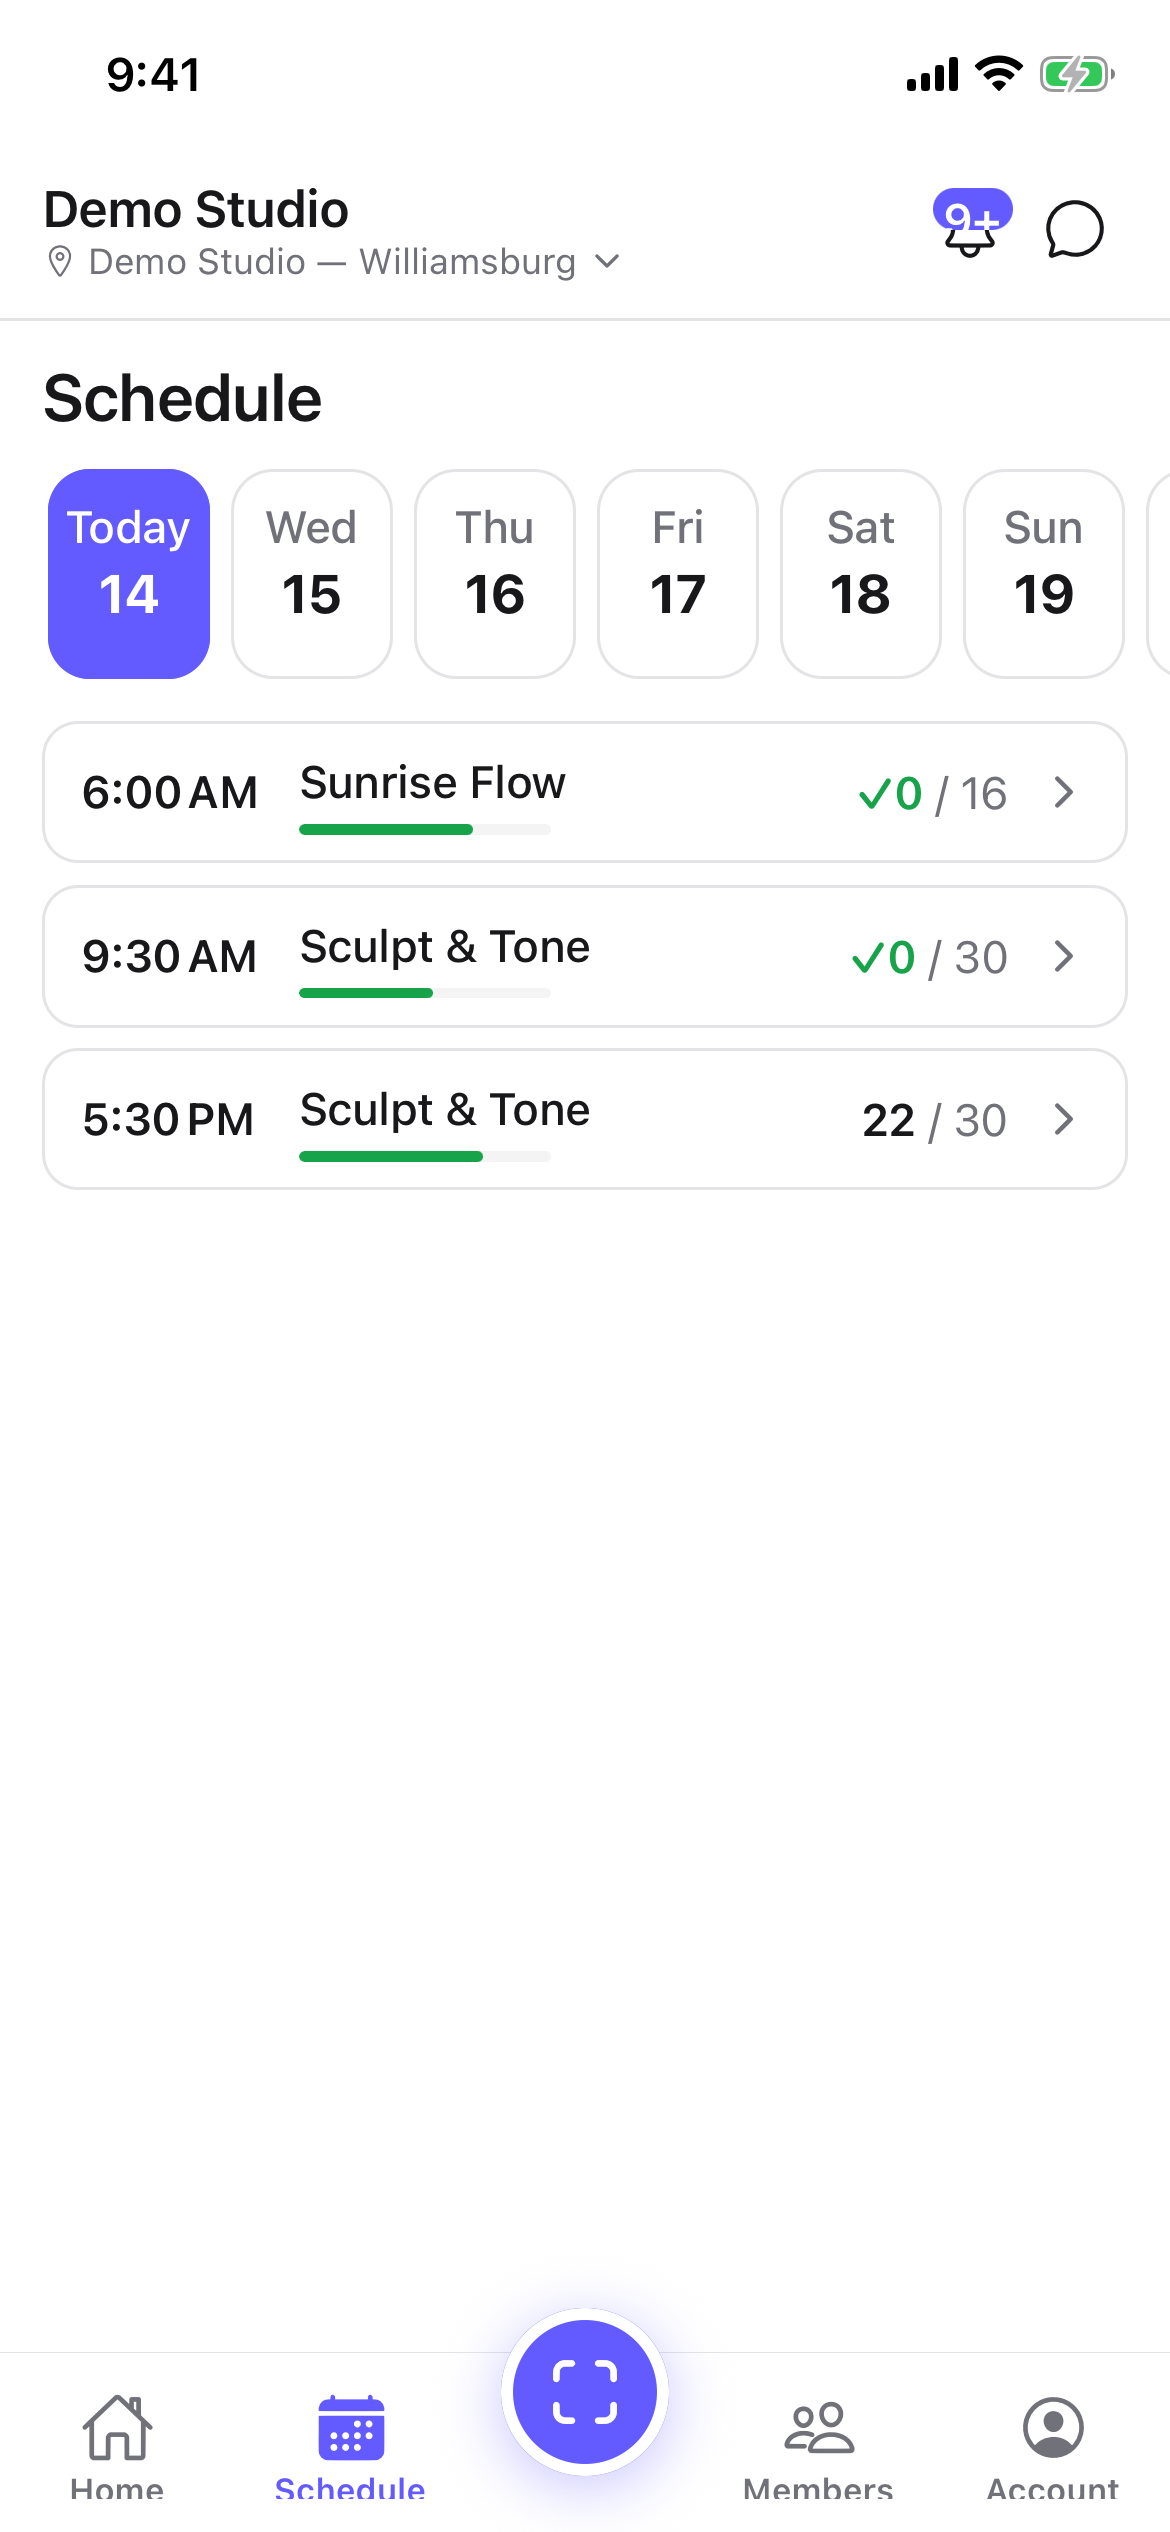
On the roster you can:
- Check in a booked member — records their visit and marks them attended in one tap.
- Mark a member No-show, or Mark attended if they turn up after all.
- Book a member into the class on their behalf — search and tap to add.
- Finalize no-shows once class is underway to mark everyone who didn't show.
- Promote someone from the waitlist when a spot opens, or remove them.
- Edit the session (top right) — owners and managers can change the time, capacity, instructor, or room, move it to another location, or cancel it. Instructors can request a substitute. See Adding to the schedule.
Looking up a member
The Members tab (owners, managers, and front desk) is your directory. Search by name or email, filter by membership status, and tap a member to open their profile:
- Their status, membership plan, and renewal date.
- Contact & details — email, phone, and date of birth.
- Staff notes you can read and add, and tags you can add or remove.
- Health & emergency info they've shared.
Changing a plan or freezing/cancelling a membership stays on the web back office.
Adding to the schedule
For: Owners & Managers
Owners and managers can build the timetable from their phone, not just view it. On the Schedule tab, tap the + button (top right).
- Pick a class, then choose the date and start time. Tap Add session to put a single class on the calendar.
- Turn on Repeat weekly to make it recurring — choose the days of the week, and optionally set an end date. ClassLift generates the sessions for you.
- Optionally assign an instructor and a room, or set a capacity for the session (it falls back to the class default).
- No classes yet? Tap New class to create one first — give it a name, location, type, duration, and capacity. Deeper class settings (booking-policy tuning, retiring a class) stay on the web back office.
To change or cancel a session after it's on the calendar, open it from the Schedule tab and tap Edit on its roster.
Taking a sale at the point of sale
For: Owners, Managers & Front-desk Staff
Sell products and take payment right from your phone. From your Home dashboard, tap Point of sale.

- Tap products to add them to the cart. If a product has options (like sizes), pick the variant.
- Tap the cart bar at the bottom to review it — adjust quantities or clear it.
- Tap Charge, then choose how the customer is paying: Cash, Card (reader) when a card reader is paired, Card (external terminal), or Other. Optionally attach a member so the sale shows in their history.
- For a card reader, hand the customer the reader and wait for them to tap, insert, or swipe. Tap Confirm to finish.
- Your sales appear under Sales (top right of the point of sale). Tap any sale to see its details — and, if you're an owner or manager, to issue a refund (full or partial).
Sales are recorded against your operating location. If you work across more than one site and haven't picked one, choose it from the top bar first — stock and takings are per location.
Setting up the product catalog and card readers stays on the web back office.
Where to find it
- Download ClassLift for iPhone or Android and sign in with your studio account.
- Home — your role dashboard (the first tab). Owners, managers, and front desk reach Point of sale from here; owners and managers also get New session.
- Schedule — the day's classes and their rosters. Owners and managers add sessions with the + button.
- Scan — the center button, for checking members in.
- Members — the member directory and profiles (owners, managers, front desk). Instructors see My classes here instead — their teaching stats and upcoming classes.
- Account — your studio, your operating location, Switch to member view, and sign out.
Learn more
- Check-in — how attendance works, at the desk and the kiosk.
- Scheduling — build the timetable your agenda is drawn from.
- Point of sale — selling products and taking payment, at the desk and on your phone.
- Reports & Insights — the full dashboard and reports on the web.
- The member app — what your members see on their phones.