Access control
For: Owners & Managers
If your doors are run by an access-control system, ClassLift can keep it in sync with membership — provisioning door credentials for eligible members and logging entry events. ClassLift is the integration layer, not the door system: your vendor still owns your doors and decides every swipe.
What you can connect
ClassLift connects to your existing vendor — Verkada, Kisi, or Brivo. Go to Facilities → Access control. The page has four parts:
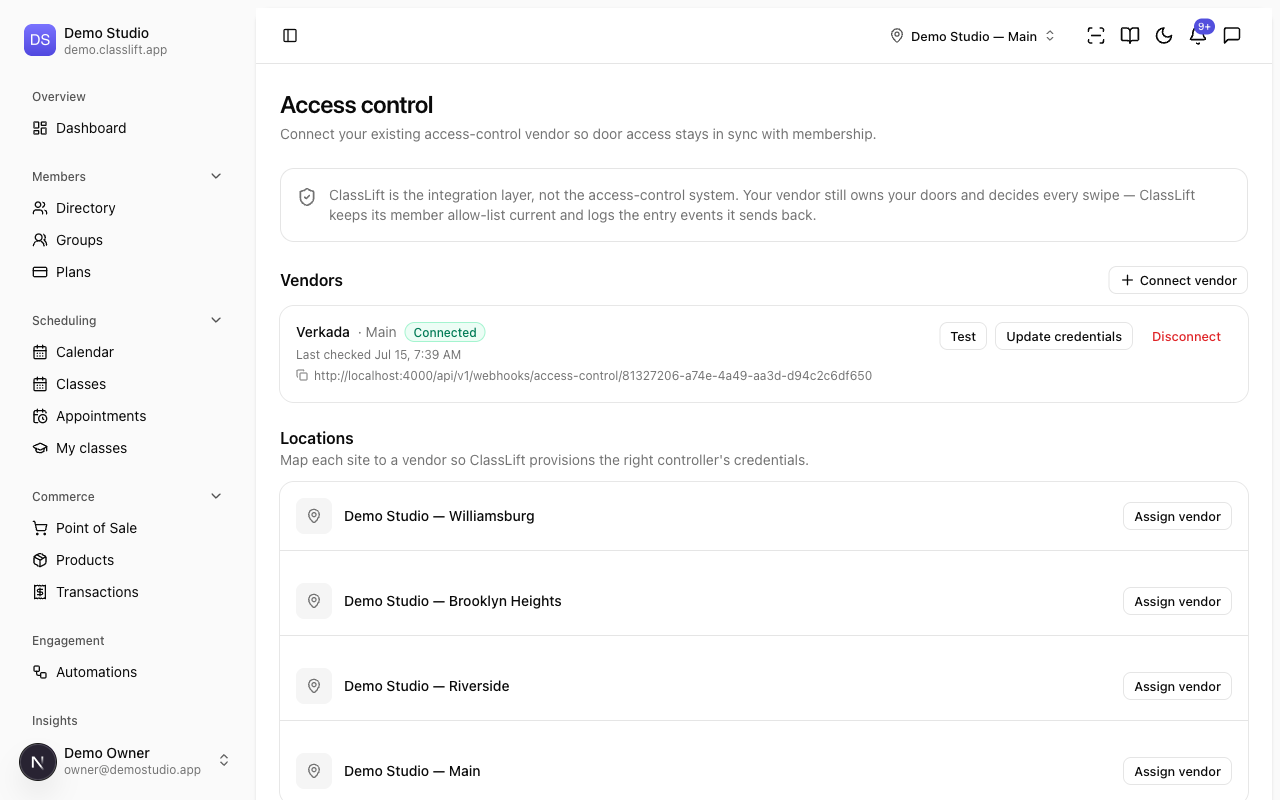
| Section | What it's for |
|---|---|
| Vendors | Connect and manage your access-control vendor. |
| Locations | Map each site to a vendor and its site/zone. |
| Credentials | The door credentials ClassLift keeps in sync per member. |
| Access events | Entries and denied swipes reported by your vendor. |
Connecting a vendor
Only an owner can connect a vendor. Setup is two short steps because your vendor needs ClassLift's webhook URL before it can give you a signing secret.
Step 1 — Connect with your API key
Under Vendors, click Connect vendor.
Choose your Vendor, give the connection a name (e.g. "Main"), paste your vendor API key (create one in your vendor's admin settings), pick your Region, and click Connect vendor.
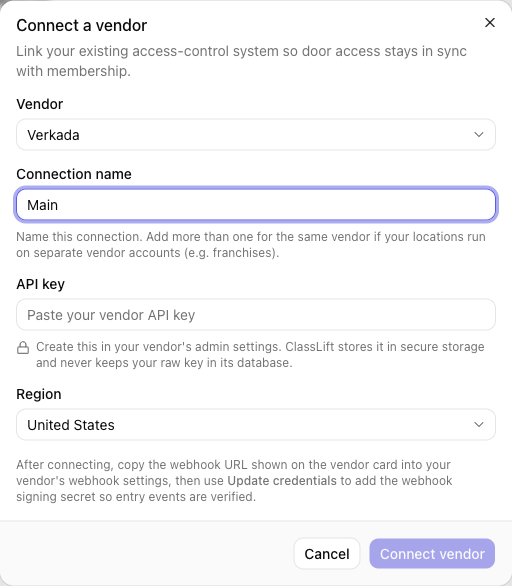
ClassLift stores the key securely and shows the connection on the page with a webhook URL.
Step 2 — Add the webhook signing secret
- Copy the webhook URL from the vendor card into your vendor's webhook settings, and have your vendor sign its events (it will give you, or let you set, a signing secret).
- Back on the vendor card, click Update credentials, paste the webhook signing secret, and save. ClassLift re-checks the connection and uses the secret to verify that entry events really came from your vendor.
Heads-up: ClassLift never keeps your raw vendor API key or webhook secret in its database — both are held in secure storage. You can rotate either later from Update credentials.
How many connections do I need?
For most studios, one connection is all you need — even with several locations. A single vendor account covers every location you run on it: each location simply maps to its own Site within that one account (see Mapping locations below). Connect the vendor once, and you're done.
When you'd add more than one: only if some of your locations run on a separate vendor account — for example a franchise location, an acquired studio, or a site billed on its own vendor contract, each with its own API key. In that case, connect the vendor once per account and give each connection its own name (e.g. "HQ Verkada" and "Franchise Verkada"). Each connection has its own API key and webhook URL, and you choose which one a location uses when you map it. If that's not you, ignore this — one connection is the norm.
Mapping locations
Under Locations, an owner or manager clicks Assign vendor on a site and enters the vendor's Site ID (from your vendor's dashboard) so ClassLift provisions the right controller's credentials. Eligible members are then provisioned automatically.
If you have just one connection (the usual case), it's already selected — you only need the Site ID. If you connected the same vendor more than once, first choose the connection (shown as Vendor · name) so the location maps to the right account.
Keeping things in sync
- Credentials lists each member's door credential and its status; use Re-sync if one needs refreshing.
- Access events shows entries and denied swipes — filter by All events, Granted only, or Denied only.
Tips
- If a member's access looks wrong, check their credential status here and re-sync it; membership changes propagate automatically otherwise.
- No vendor? You don't need this section — check-ins and bookings work without it.
Troubleshooting
| Issue | What to do |
|---|---|
| Connect vendor isn't available to me | Only owners can connect a vendor; managers can assign a connected vendor to a location. |
| Entry events aren't showing in Access events | Make sure you've pasted the webhook URL into your vendor and added the webhook signing secret via Update credentials — ClassLift ignores unverified events. |
| A location can't be assigned | Connect a vendor first, then assign it to the location. |
| A member can't get through the door | Check their credential status and Re-sync; remember your vendor makes the final decision at the door. |