Locations
For: Owners & Managers
Locations are your physical sites — where you run classes and take check-ins. This page covers adding a location, opening and closing one, and pairing a card reader for the desk.
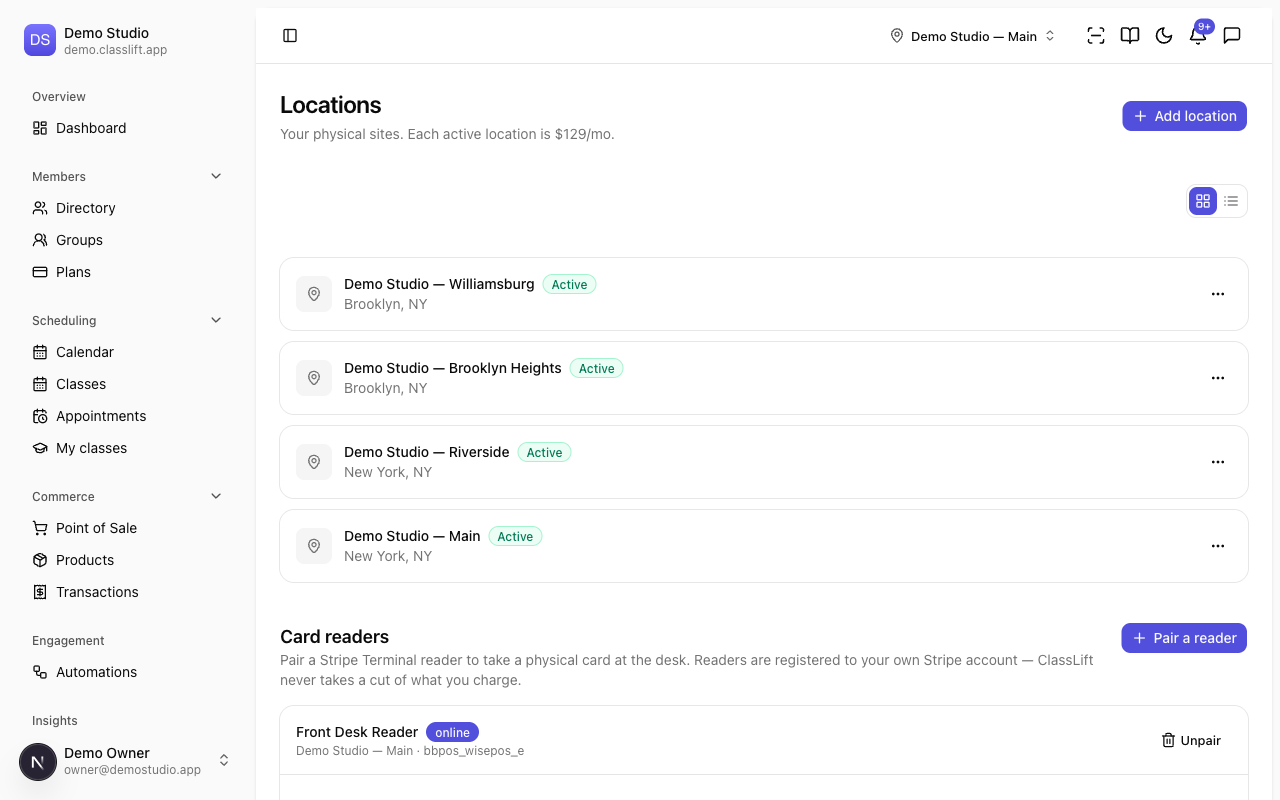
Use the toggle at the top right to switch between a card view and a compact list view — the list view shows each site's status, address, and timezone in one scannable table.
Adding a location
- Go to Facilities → Locations and click Add location.
- Enter the Location name and address — Street address, City, State / region, Postal code, and Country.
- Pick the Timezone for this site. Leave it blank to use your organization's default timezone. Class times and check-ins at this location follow this zone.
- Set Opening hours — turn on each day the location is open and enter its open and close times. Days you leave off show as Closed. You can set these later.
- Click Add location.
Each active location is $129/mo, prorated for the current cycle — you'll see this noted on the screen and reflected on your subscription.
Editing a location
To change a location's name, address, timezone, or opening hours, open its ⋯ menu and choose Edit location. Update any field and click Save changes.
To change whether a location is open for business, use the status actions below rather than Edit — they keep your billing in step.
Opening and closing a location
Use a location's ⋯ menu:
| Action | What it does |
|---|---|
| Temporarily close | Pauses the location and removes it from your bill until you reopen it. |
| Reopen (bill $129/mo) | Brings a temporarily-closed location back and back onto your bill. |
| Close permanently | Closes it for good — stops all bookings, check-ins, and access, and removes it from your bill. This can't be undone. |
A location shows Active, Temporarily closed, or Permanently closed. To pause for a holiday or renovation, use Temporarily close rather than closing permanently.
Pairing a card reader
At the bottom of the Locations page, Card readers lets you connect a Stripe Terminal reader so staff can take a physical card at the desk. Readers register to your own Stripe account — ClassLift takes no cut.
- Click Pair a reader.
- Put the reader into pairing mode to show its code, then enter the Registration code, a Name (e.g. Front desk), and the Location it belongs to.
- Click Pair reader.
Staff then see the Card (reader) payment option at that location's point of sale. Without a reader you can still take cash, charge a card on file, or record an outside card. Use Unpair to remove a reader.
Tips
- Each location has its own Timezone and Opening hours, set when you add it or later via Edit location. A location left without a timezone follows your organization's Default timezone — set that under Organization settings.
- Pair the recommended Stripe Reader S700 for card-present payments at the desk.
Troubleshooting
| Issue | What to do |
|---|---|
| Add location / Pair a reader is disabled | Add at least one location first; readers need a location to pair to. |
| A closed location still shows | Temporarily-closed locations stay listed (so you can reopen them); permanently-closed ones remain for history. |
| The Card (reader) option isn't at the till | Confirm a reader is paired to that location and shows online. |